Thursday, February 7, 2019

 Hello everyone!! I 'm back with another card, this time I made a card using the adorable hedgehogs from the February 2019 Limited Edition Card Kit from SSS.
First, for my background, I used a 4 1/4 x 5 1/2 piece of Tim Holtz Distress Watercolor Cardstock and trimmed down to 3 3/4  x 5 with a stitched rectangle die, then I ink blend Picked Raspberry Distress Ink, Festive Berries, and Spun Sugar Oxide Inks, I splash some water on top after I was done ink blending even though you can really see it too much.  I color the hedgehogs with my Zig Clean Color Real Brush Markers and to add a little bit of sparkle I went over the flowers, bow, and heart with my Wink of Stella Brush.
After that, I cut a 4 1/4 x 5 1/2 panel from one of the 6 x 6 pattern paper that came in the kit and glued that to my A2 size card base, then I stamped the sentiment on a striped of white cardstock with VersaMark Ink, sprinkled it with Rangers Princess gold embossing powder  and heat set it with my heat tool, I glue the hearts directly on the card and put foam tape to the back of  the hedgehogs and on the back of the sentiment to add a little bit of dimension.
For the inside of the card, I stamped the sentiment with Festive Berries Oxide Ink and the little hearts with the same ink color and Spun sugar Oxide Ink, and to finished it up I cut a striped from the pattern paper I used for the front of the card and place it on the bottom of the card.

I still working on more cards from this kit I'll be posting them as soon as i am done with them.

I hope you guys like it, please feel free to leave your comments and let me know what you guys think. Until next time  I wish you have an amazing day!

Please Note:
I ’m not getting compensations of any kind for any of the products I mention in this post, all opinions are my own and supplies were purchased with my own money.

Wednesday, February 6, 2019

Hello everyone!!☺️ Today I want to share a card made with the new February 2019 Limited Edition Simon Says Stamp Card Kit and some paper scraps that I have in my stash, I have the commitment to use all or most of my paper scraps because I have a box full of scraps in Ziploc bags by color🤪.
First I use the Browns and light brows to die cut the sloth, the hedgehog 🦔  and the bows on the sloth, I glued all the pieces on a sheet of copy paper and cut the excess with my scissors ✂️ .


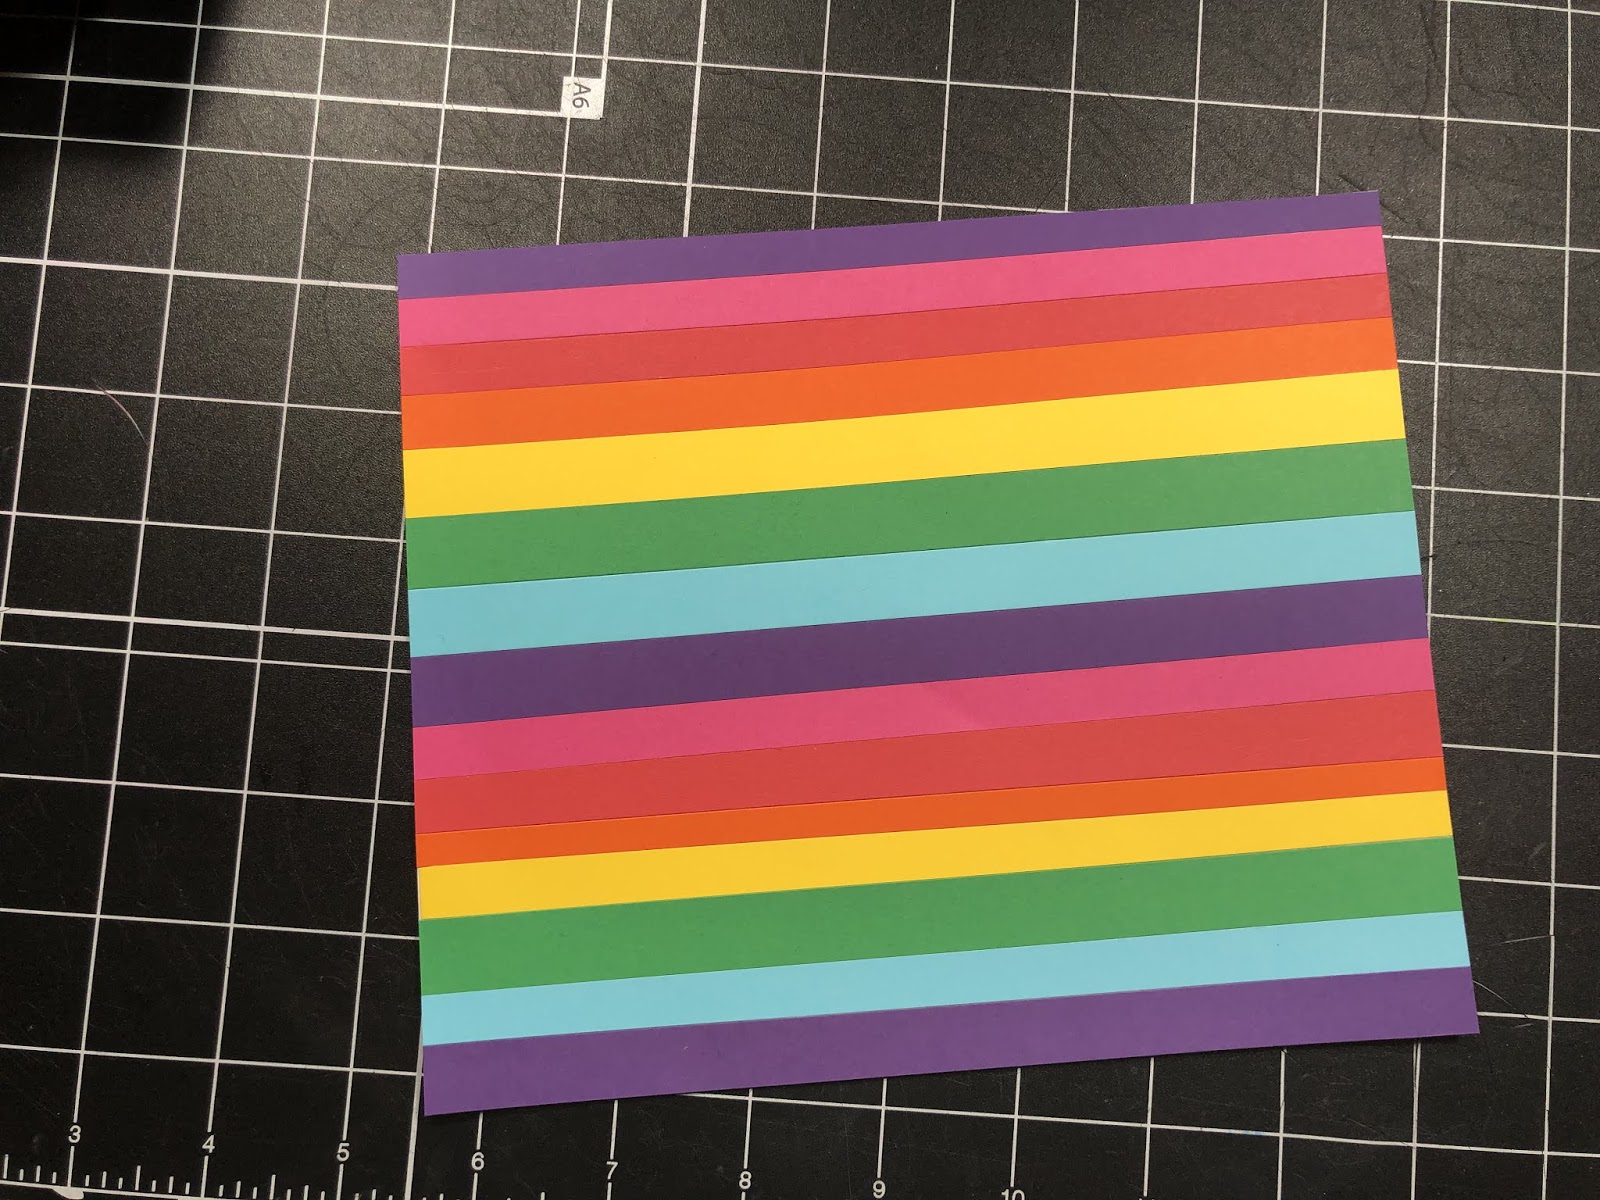
Then I choose the colors I was going to use for my background and since I have a bag with just paper stripes,  I decided to make a rainbow background, if you look closely you might see that the stripes aren’t even because they are all leftovers from a previous project. I glued all the stripes on to a piece of copy paper again that way it won’t be too thick, then I trimmed the edges with my Tim Holtz paper trimmer, once I had my paper even I took a stitched rectangle die and cut a rectangle a little smaller than an A2 size card (I’m not too good with measurements) then I die cut a piece of light yellow cardstock to mount the sloth on top.


Then I die cut the word Friend from My Favorite Things and the I Love You sentiment from the Love Notes that came with the kit, I stamped the sentiment on a piece of black cardstock with VersaMark Ink and heat embossed it with SSS white embossing powder, then I trimmed the sentiment and glued on top of the Friend word.

I finish the card stamping the Happy Valentine’s Day sentiment from the same stamp set with Festive Berries Oxide Ink and the little hearts ♥️ also from the same kit with Festive Berries, Wilted Violet, Squeeze Lemonade, Carved Pumpkin, Twisted Citron and Picked Raspberry distress inks and to finish it all up I cut a small stripe from the leftover rainbow paper I made and glued to the bottom of    
 the card.
I hope you guys like it, please feel free to leave your comments and let me know what you guys think. Until next time  I wish you have an amazing day!

Please Note:
I ’m not getting compensations of any kind for any of the products I mention in this post, all opinions are my own and supplies were purchased with my own money.

Sunday, January 27, 2019

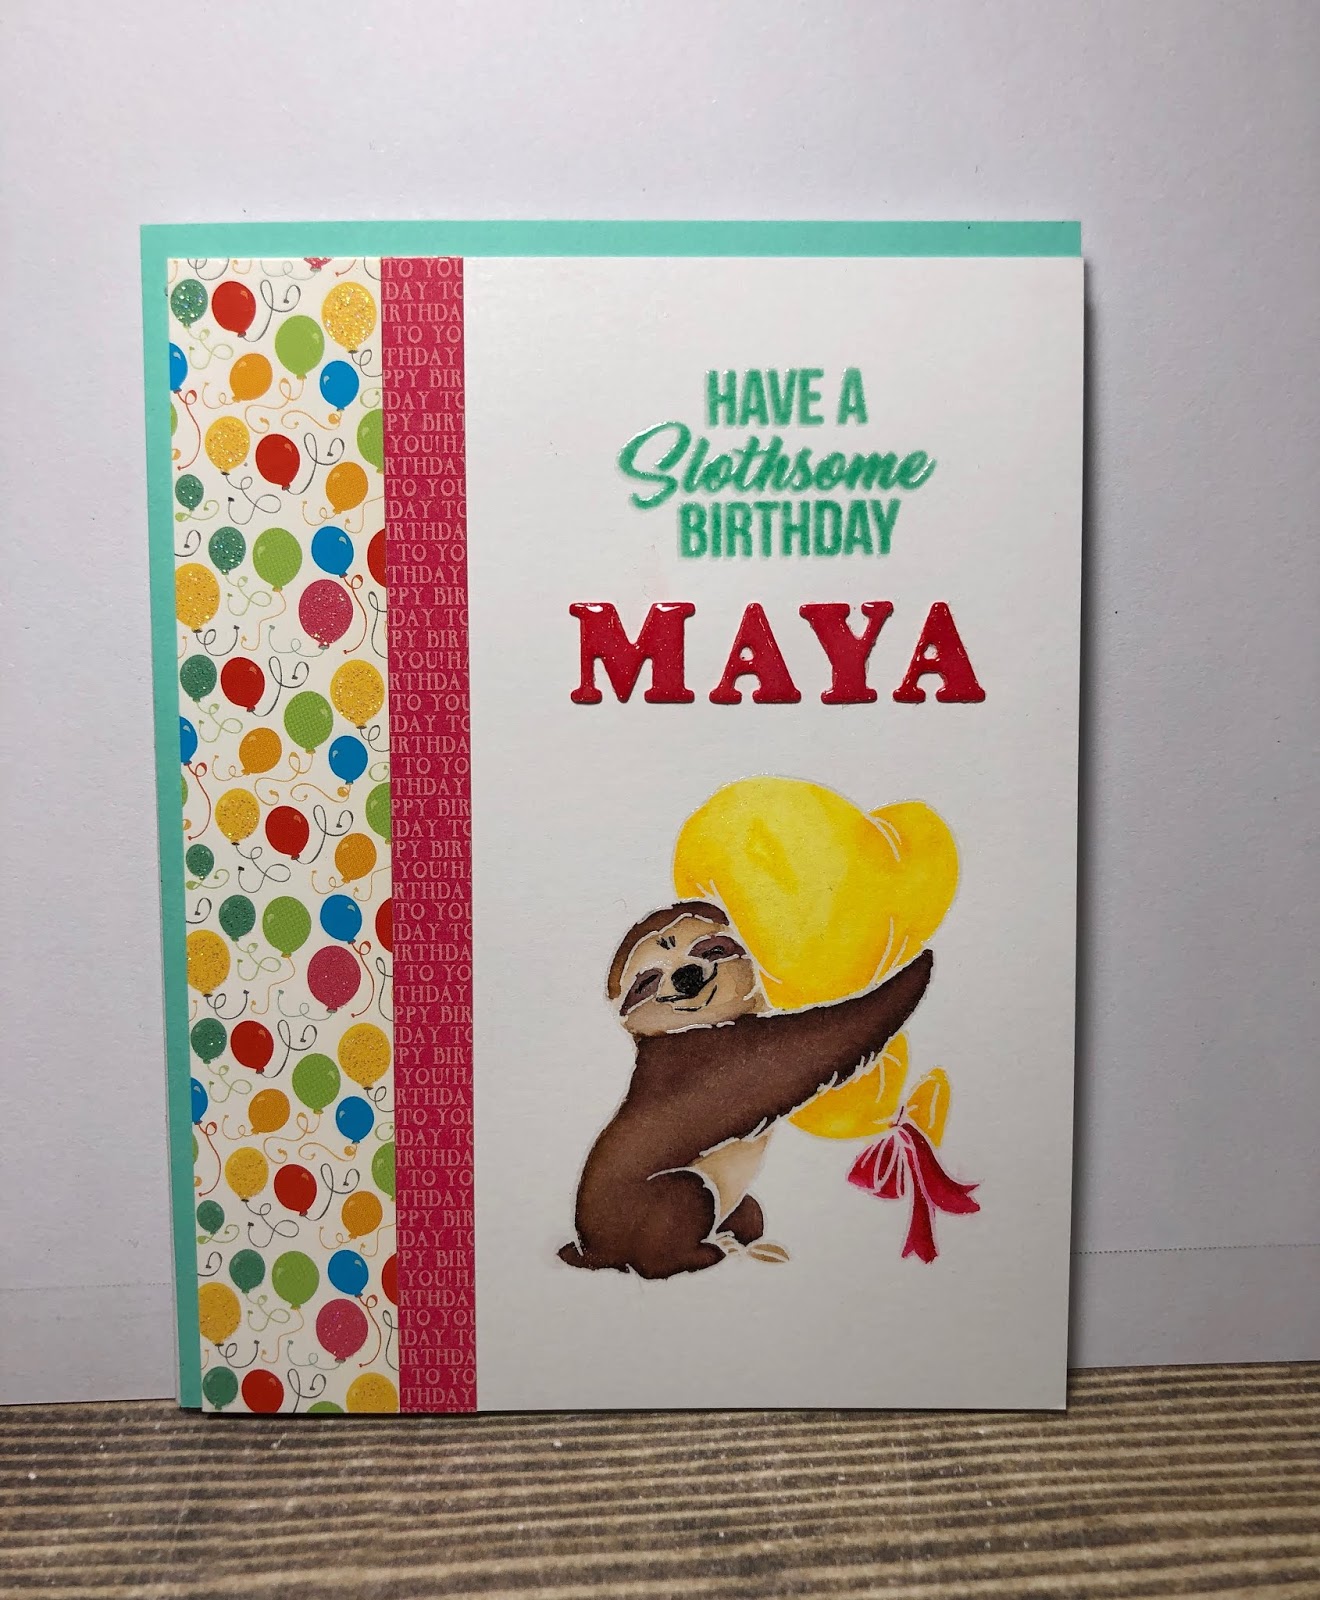
Hello everyone, happy Sunday!! Today I want to share with you a card I made for my daughters birthday.

For this card I used the Art Impressions SLOTH-SOME stamp set, I love this stamp set it is so cute. First I stamped the image and the sentiment with VersaMark watermark ink and then embossed it with Simon Says Fine Detail Clear embossing powder, I heat set it my heat gun. 
After that I started to color the image with my Zig Clean Color Real Brush markers and when I got to color his face I realize that I embossed his nose and the eyes and it looked a little funny, so I decided to remove the embossing powder very carefully from his face and color that with a black pen, after I was done with the coloring I assemble the card, the paper I used for this card is The Birthday Wishes Stack an old paper pad from DCWV.

Next I use apply Festive Berries Distress Oxide ink on a piece of card stock let it dry for a few minutes and then I used the letter die set set from Art C to create my daughters name, I glue the name on the card and then I applied glossy accents to make look shinny.


 For the inside of the card I stamped the sentiment with Cracked Pistachio Distress Ink and Festive Berries Distress Oxide ink I used the sentiments from Simon Says Stamp Birthday Message and the same image I used on the front of the card in the inside, and that finished up the card.

I hope you guys like it, please feel free to leave your comments and let me know what you guys think. Until next time  I wish you have an amazing rest of your day!!

Please Note:
I’m  not getting compensations of any kind for any of the products I mention in this post, all opinions are my own and supplies were purchased with my own money.

Wednesday, January 16, 2019


Hello everyone!! I know it being a long time since the last post😜 but it’s to hard for me to keep up with updating my blog and to post on Instagram at the same time, I always forget that I have other accounts and that if I want to share with you all my creations I have to be on top of all of them. But I’ll try to do this more often, thank you all of you who take the time to take a look at my fewest posts I really appreciated. 

Today I’m sharing a card that I created usind the stamp set Dare to be Fabulous from Art Impressions, I stamp the image with MFT Black Licorice Ink, I notice that, that ink doesn’t smear when using my Alcohol marker like the do when I use Memento Tuxedo Black Ink, I used my Spectrum Noir Markers noir to color the entire image. For the background  I used the Heidi Swapp favorite things paper pad,  then I finished it up with some nuvo crystal drops and I used the CZ designs Besties stamp set, stamped it on a piece of  black cards stock with versafine clear ink and embossed it with Simon says with embossing powder, I fuzzy cut it and  adhiere the piece on foam tape adhesive for a little bit of pop.
  
Then for the inside I cut two little stripes  of the same paper, one in pink and the other one with the same paper I used for the background in the front of the card, next I stamp the sentiment in Simon Says scuba ink color and Memento  Rose Bud color ink, to have the two colors I use my Tim Holtz stamp Platform to make sure I stamp my sentiment on the same place since I mask the word friend and inked up the rest of the sentiment, then I mask part of the sentiment and ink up the work friendship and stamp it on the card. 


And that finished up the card, very simple and I think it came so cute.                            

I hope you guys like this card, feel free to leave a comment below and let me know what you guys think. Until next time  I wish you have an amazing rest of the week

Please Note:
I'm not getting compensations of any kind for any of the products I mention in this post, all opinions are my own and supplies were purchased with my own money.

Thursday, May 17, 2018

Hello everyone, I hope you are having a lovely day, today I want to share with you these beautiful cards with what I had in my stash, because "why not" most of the time we purchase a lot of goodies and we forgot we have them so today is the day I got to use them.
For these two cards, I used the GinaK Rose Bouquet I stamp the image on Strathmore Bristol Smooth Watercolor Paper using my VersaFine Onyx Black Ink and embossed them with clear embossing powder, then I color them with the Zig Clean Color Real Brush Markers after I was done with the coloring I decided to stencil the background with some stencils I bought at my local Walmart and ink them up with Picked Raspberry and Squeezed Lemonade Distress Inks, for the sentiments I used a very old stamp set from C.C. Designs its called All About Mom and for the other one the Mom wafer dien from Sugar Pea Designs and ther I Love You! sentiment from Altenew Best Mom Stamp Set.

For this card, I did the same prosses as the other two but for this one, I used Versamark Ink and Princess Gold Embossing Powder from Ranger and the sentiment from C.C. Designs All About Mom Stamp Set I stamped the sentiment on VersaFine Onyx Black Ink.

I hope you guys like these cards as much as I like them, feel free to leave a comment below and let me know what you guys think. Until next I wish you have an amazing weekend.

Please Note:
I'm not getting compensations of any kind for any of the products I mention in this post, all opinions are my own and supplies were purchased with my own money.
Hello everyone I hope you are having an amazing day. Today I'm sharing with you these three beautiful cards I created with the Lovely Garden stamp set from Stampendous.

First I stamped the flowers with my Versamark Clear Ink on Strathmore Bristol Smooth water color paper, then I embossed some of them with gold powder from Ranger and other ones with white embossing powder from Color Box, then I colored them with My Zig Clean Clear Real Markers and dust cut them.

I cut some pattern paper from recollections from Michael's that I had in my stash, for one of the cards I desired to mask a circle in the center of the card and used Cracked pistachio Distress Ink to make the flower pop a little bit, then I die cut the word mom using the wafer die that comes in the Simon Says Stamp Mother's Day Limited Edition Card Kit and and coloured with the Spectrum Noir Markers creating  an ombre effect, for the other one I used the die from Sugar Pea Designs, using a piece of glitter card stock I had in my stash, for the third card I use the Simon Says Stamp Love You Mama Stamp Set and stamped it on Memento Rose Bud ink.

And that my friends finished my cards, I hope you guys like them, please feel free to leave me your comments below and let me know what you think. Until next time I hope you have an amazing week.

Please Note:

I'm not getting compensations of any kind for any of the products I mention in this post, all opinions are my own and the supplies were purchased with my own money.

Monday, April 30, 2018

One Card Kit 7 Cards

Hello everyone Carla here again with another hand full of cards. I guess I got a little crazy this time and I went a little over my budget and bought not just one but the two Simon Says Stamp card kits, the Special Limited Edition Mother's Day and the Kind Heart which I haven't started working on it because I'm being to bussy working on the Mother's Day one, but I will post some pictures once I'm done with the other one as well. So far these are the card I made with the Mother's Day kit, the very last card was inspired by Laura Bassen, she featured on the SSS Youtube channel to promote the release of the card kit.
I hope you guys like them and get you inspired please feel free to leave your comments and let me know what you guys think. Until next time I hope you have a fun and bless week.     


Please Note:
I'm not getting compensations of any kind for any of the products I mention in this post, all opinions are my own and the supplies were purchased with my own money.

Tuesday, April 17, 2018

One more Mother's day card

Hello everyone, I hope you guys are having a wonderful day, today I want to share with you other mothers day card, because why not, mothers day is just around the corner and we have a lot of friends and family that are moms, or grandmothers and we will need all of this cards.
First of all, I stamped all of my flowers from the Cherry Blossom from Pretty Pink Posh stamp set with My Color Box White embossing powder I think is easier for me to control the water since I'm not an expert in watercolor and then I used my Zig Clean Clear Color Real Brush Markers to color all of them, then I fussy cut the flowers since I don't have the coordinating dies.

After I was done cutting  them I stamped the sentiment twice one in Versafine Onix Black and the other one in pink and compared them to see which one I like the most, so I decided to go for the black sentiment, which I used a clear embossing powder that I had in my stash and then I color the empty spaces in the word Mother creating an ombre effect. I arrange my flower on the left side of the sentiment to make sure where I want the flowers and once I was sure where I want them I grave some post-it tape to hold them all together and then I put some adhesive on the back and some foam tape for the flower I want to have a little bit of a pop so that not all the flowers laid flat.
After I have all of my flowers secure to my panel I set that aside and stamped the sentiment on the inside of my card using the Mom word from the Altenew stamp set Best Mom and the other one from  Wplus 9 Strictly Sentiments 4 and the flower from the Cherry Blossoms from Pretty Pink Posh.
Once I was done with the inside of my card I grave a piece of pattern paper from my stash and added to the side of the card for an extra detail and mounted my panel on an A2 size card.
To finish it all I stamped the envelope with the same flowers to match the flowers on the card using the yellow and blue inks I had in my stash and the pink one from Memento Rose Bud. And complete my card for today.

I hope you guys like it, please feel free to leave your comments and let me know what you think until next time enjoy the rest of your day.

Please Note:
I'm not getting compensations of any kind for any of the products I mention in this post, all opinions are my own and the supplies were purchased with my own money.

Flowers for Mom

Hello everyone, Today I want to share a card I made with the Best Mom stamp set from Altenew is an old stamp set but is new to me I think this set was released last year around this time.

first I stamped the image on Neenah smooth desert 100 lb cardstock with my Versamark clear ink and embossed it with white embossing powder from Color Box, then I used my Prima Watercolor pencils to color the image, I used 3 sets the first one Scenic Route set., Green #54, The Basics set., Green # 47, #44
Purple #80, White # 0Spring-Fall set., Fuchsia # 30, Pink #34, I used the white as a blender for all of my coloring after I was done coloring my image I fussy cut it and stamped my sentiment on a 4.25 in by 5.5 in a piece of kraft cardstock I had in my stash using the same embossing powder I use for the flowers and color the empty spaces inside the letter with the color I use on the flowers.
After I was done with everything I started to assemble my card I mount my panel on an A2 size card and added some sequence for an added detail.
To finish it all,  I stamp the envelope with the same flower stamp with Dusty Concord Distress Ink.
 
I hope you guys like my card, feel free to leave me a comment and let me know what you guys think until next time Have an amazing day.

Please Note:

I'm not getting compensations of any kind for any of the products I mention in this post. All opinions are my own and the supplies were purchased with my own money.

Thursday, April 12, 2018

Jumbo Flower

Hello everyone Carla here with another card.
I went to the Scrapbook Expo last weekend and I bought this beautiful stamp set together with some other goodies that hopefully I get to do something later.  I got home and sat down in front of my desk, I open my computer and started watching one of Gina K. from StampTV with Gina K. videos on youtube, she made a card using a flower similar to this one and I love the color combination, and I decided to color mine using the same colors she was using, except that I add an extra color to the flower and I embossed my flower in gold embossing powder.  

Once I color all my flowers and leaves I fussy cut them and started assembling my card, I pick this black and with stripped cardstock because I saw a picture on Pinterest similar to my card and I love it so I came up with this idea.
Then I stamped the sentiment in the front of the card in gold using the same embossing powder I used for the flowers, then I glue the leaves directly on the card and put some foam tape on the back of my flower.
Next, I stamped the medium size flower on the inside of the card and then the sentiment.
After I was done with the card I stamped the envelope with the flower I use for the front of the card with gold ink, when I thought I was done with the card, I decided to make the black envelope and stamped the same flower in gold on the front of the envelope also, after I finish everything I didn't know which envelope to use because I like the way both envelopes look with the card.
I hope you guys like my card, feel free to leave me your comments and let me know what you think until next time enjoy the rest of your day wonderful day.

Here is a list of the products I used to make this card:
*Stampendous Lovely Garde Stam Set
*Zig Clean Color Real Brush Markers
Mid Green 046, Olive green, Red 020, Scarlet Red 023, Lemon Yellow 051, Yellow 050, 
*Versafine - Onyx Black Ink
*Delicata -  Golden Glitz
* Versamark - Watermark
*Darice - Black Cardstock for the envelope 
*Recollections - Black and White striped cardstock
*We R Memorie Keppers envelope punch board

Please Note:
I'm not getting compensation of any kind for any of the products I mention in this post. All opinions are my own and the supplies were purchased with my own money.  


Thursday, April 5, 2018

Daffodils Card

Hello friends!!  today want to share with you a Mothers day card.
For this card, I use my Zig Clean Color Real Brush Markers, but first I stamp the flowers with Versamark Clear Ink using the Daffodils stamp set from Clearly Besotted on watercolor paper and embossing them with Color Box White embossing powder, then I glue two little strips of glitter cardstock I had in my stash once I had glue that together I adhere it to a piece of blue cardstock from Recollections and embossed the sentiment using the same embossing powder I used for the flowers, I put some foam tape on the back and assemble my card.

Next, I stamped  the same image onto the inside of the card with yellow ink from Color Box and the sentiment from C.C. Designs  All About Mom stamp set, (this is an old stamp set I had in my stash and I'm not sure if it still available) I stamped it with Versamark Onyx Black Ink.


To finish it off I stamped the same image onto the envelope with the same ink color. 
And that finish off my card for today I hope you guys like it, Please feel free to leave your comments and let me know what you think.
Until next time, have an amazing week.

Please Note: I'm not getting compensation of any kind for any of the products I mention in this post. All opinions are my own and the supplies were purchased with my own money.

Friday, March 30, 2018

Tulips Card

Hello everyone, Carla here with another card, this time I would like to share a Mother's day card, since mother's day is just around the corner.


for this card, I use the Spring Tulips from the Clearly Besotted stamp set, first I stamped my image with Versamark Watermark Ink on a piece of kraft cardstock paper and embossed it with white embossing powdered from Color Box, after I embossed the tulips I color them with my Prima Watercolor Pencils, I used 3 sets., From the Basics set I used green #44 and Purple #80, from the Scenic Route I used Green #54 and Pink #09, and from the Spring and Fall set I used Green #58, Pink #34, Fuschia #30 and white. I used the white pencil to kind of blend the colors.

Once I had finished coloring I decided to cut out the tulips in the center of my piece and then die cut a stitch oval and glue the tulips on top, I also used a rectangle die to cut out my piece, after I have all of my pieces ready I started to assemble my card, for the sentiment I used the word Mom from an old stamp set from C.C. Designs and embossed it with Princess Gold embossing powder from Ranger on a piece of vellum, the sentiment I used on the inside of the card is from the stamp set Spring Daffodils from Clearly Besotted, to finish it up I stamped the other tulip image that came on the same tulips set in the inside of my card and onto the envelope with Victorian Velvet Distress Ink.

And that finish up my card for today I hope you guys like it, please feel free to leave your comments and let me know what you guys think.

Until next time, have an amazing weekend.

Please Note:

I'm not getting compensations of any kind for any of the products I mention in this post.  All opinions are my own and the supplies were purchased with my own money.


Wednesday, March 28, 2018

Always together

Hello, Friends Carla here with a new card, This time I want to share with you this cute image from Art Impressions Love Birds Stam Set they release this set around Valentine's Day and I just think these two are so adorable, the whole is.
    

first I stamped the image on a 5 1/2 x 4 1/4 cardstock, and I made a mask from Inkadinkado masking paper with Versafine Onix Black Ink, once I mask the image I ink blended the sky with Tumbled Glass Distress Ink making my own cloud stencil from a piece of cardstock.
For the grass, I used Mowed Lawn and Peeled Paint and put some little dots with my Spectrum Noir Markers, after i was done with the ink blending I removed the mask and color the image with my Spectrum Noir Markers, I use my white Gelly Roll Pen to draw some polka dots on the umbrella, then I stamped some little hearts on Schoolhouse red from Simon Says Stamp and add some Glossy Accents to the hearts, and I stamped the sentiment in Onix Black Ink.

Next, I die cut the frame to make it look like a picture frame, I mounted everything on a piece fun foam cut out a piece of pattern paper from an old paper pad I had and some plain color cardstock from Recollections.

To finish it all I stamped a sentiment and the hearts from the same stamp set on Onix Black Ink and the hearts in Schoolhouse red Ink, and since I always love to decorate the envelope I stamped the same hearts I used for the inside of the card in the same color ink alongside the envelope.


And that finish up my card for today I hope you guys like it, feel free to leave a comment and let me know what you guys think.

Until next time, have a wonderful week.

Please Note:
I'm not getting compensations for any of the products I mention in this post. All opinions are my own and the supplies were purchased with my own money.

Friday, March 9, 2018

Butterflies

Hello friends Carla here with a new post, today I want to share with you clean and simple butterfly cards. 
For these cards, I used some butterfly buttons that I had in my stash for a very long time they are from American Crafters and I bought them at my local Michaels store so I finally got to use them. I stamp the envelopes to coordinate with the cards, I used the Hero Arts Stamp and Cut Butterflies set and Simon Says Stamp Hot Mama and Scuba inks.
I created them the same way the only difference is the sentiments, for this card I used the sentiments from Hero Arts Thank stamp and cut set I stamped them with Versamark Onyx Black ink.
And for this card, I used the Simon Says Stamp Thanks For Being There Stamp Set I die cut the squares with a stitched square die that I purchased at AliExpress.com put some foam tape on the back of each square and mounted them on the cards for a little more dimension since the butterflies already came with a piece of foam tape on the back of each of them.
Next, I stamped the sentiments on the inside of the cards using the Thanks For Being There Stamp Set From Simon Says Stamp and for the bottom card sentiment I use the Thanks Stamp and Cut Set from Hero Arts, and I place one of the butterfly buttons on the inside of the cards I just removed the piece of foam tape that came on the back to make it flat and less bulky
And that will complete my cards for today I hope you guys like them, feel free to leave a comment and let me know what you guys think.

Until next time, have an amazing weekend!

Please Note:
I'm not getting compensations for any of the products I mention in this post. All opinions are my own and the supplies were purchased with my own money.